Friday, July 31, 2020

Tempura


Tempura

I recently discovered how easy it is to make tempura when researching how to fry pumpkin blossoms (link to that post

I am new to frying, so rest assured; if I can do it, you can too. I will explain the tempura batter and then given tips on frying the various foods mentioned above.


Ingredients (tempura batter):
  • 1 egg
  • 1 cup flour
  • 1 cup cold water (I use refrigerated water)
That's it. Amazingly simple. I have also made a quick version that is 1:1 flour and cold water (great for frying only a couple items)


Procedure:
  1. Preheat oil in wok or pan to 340ºF to 360ºF. Doing this first helps keep the batter cold which is critical.
  2. Prepare foods to be fried. Clean and shell shrimp. Cut vegetables into strips (do not precook)
  3. Mix tempura ingredients together (do not overmix! Multiple sources said that the batter should be lumpy). I use chop sticks for this step.
  4. Dip item in batter, coating both sides, and allow excess batter to trip off.
  5. Put item into hot oil (be careful not to splash hot oil)
  6. Cook item until golden brown. ~2-4 minutes for vegetables (until soft). ~3+ minutes for shrimp (until fully pink). ~5 minutes per side for mahi Mahi (until fully cooked)
  7. Remove from oil and place on a paper towel lined plate
  8. Enjoy (best enjoyed hot or warm)
That's it. Like I said, it is super easy and delicious.

Thursday, July 30, 2020

Fried Pumpkin Blossoms


Fried Pumpkin Blossoms

The idea of fried pumpkin blossoms may seem strange to the uninitiated, but these tasty little frites are simple to make. Mine were from a mini pumpkin plant, but any pumpkin, squash, or zucchini flower should be suitable. My plant's flowers only last a day, so each morning I wake up to new pumpkin flowers to fry.

Don't worry if you are new to frying, these edible delights were my first foray into frying. I used a modified tempura batter to be light and crisp like the flowers rather than drowning them in batter.


Ingredients:
  • Pumpkin flowers
  • Frying batter (1:1 cold water and flour. You can add more cold water. Batter should be more of a liquid than a paste. Thankfully, it does not have to be an exact ratio)
  • Oil (for frying)

Procedure:
  1. Wash the flowers and cut out the center of the flower (stamen) which is covered in pollen (see Figure 1).
  2. Heat oil to about 350ºF/177ºC.
  3. Mix batter ingredients in a small bowl.
  4. Dip flowers into batter and place them in the hot oil. Allow to cook until browned on the edges.
  5. Remove, cool, salt to taste, and enjoy (see Figure 2).

Figure 1.

Figure 2.

Saturday, October 27, 2018

Pumpkin Roll

Pumpkin Roll

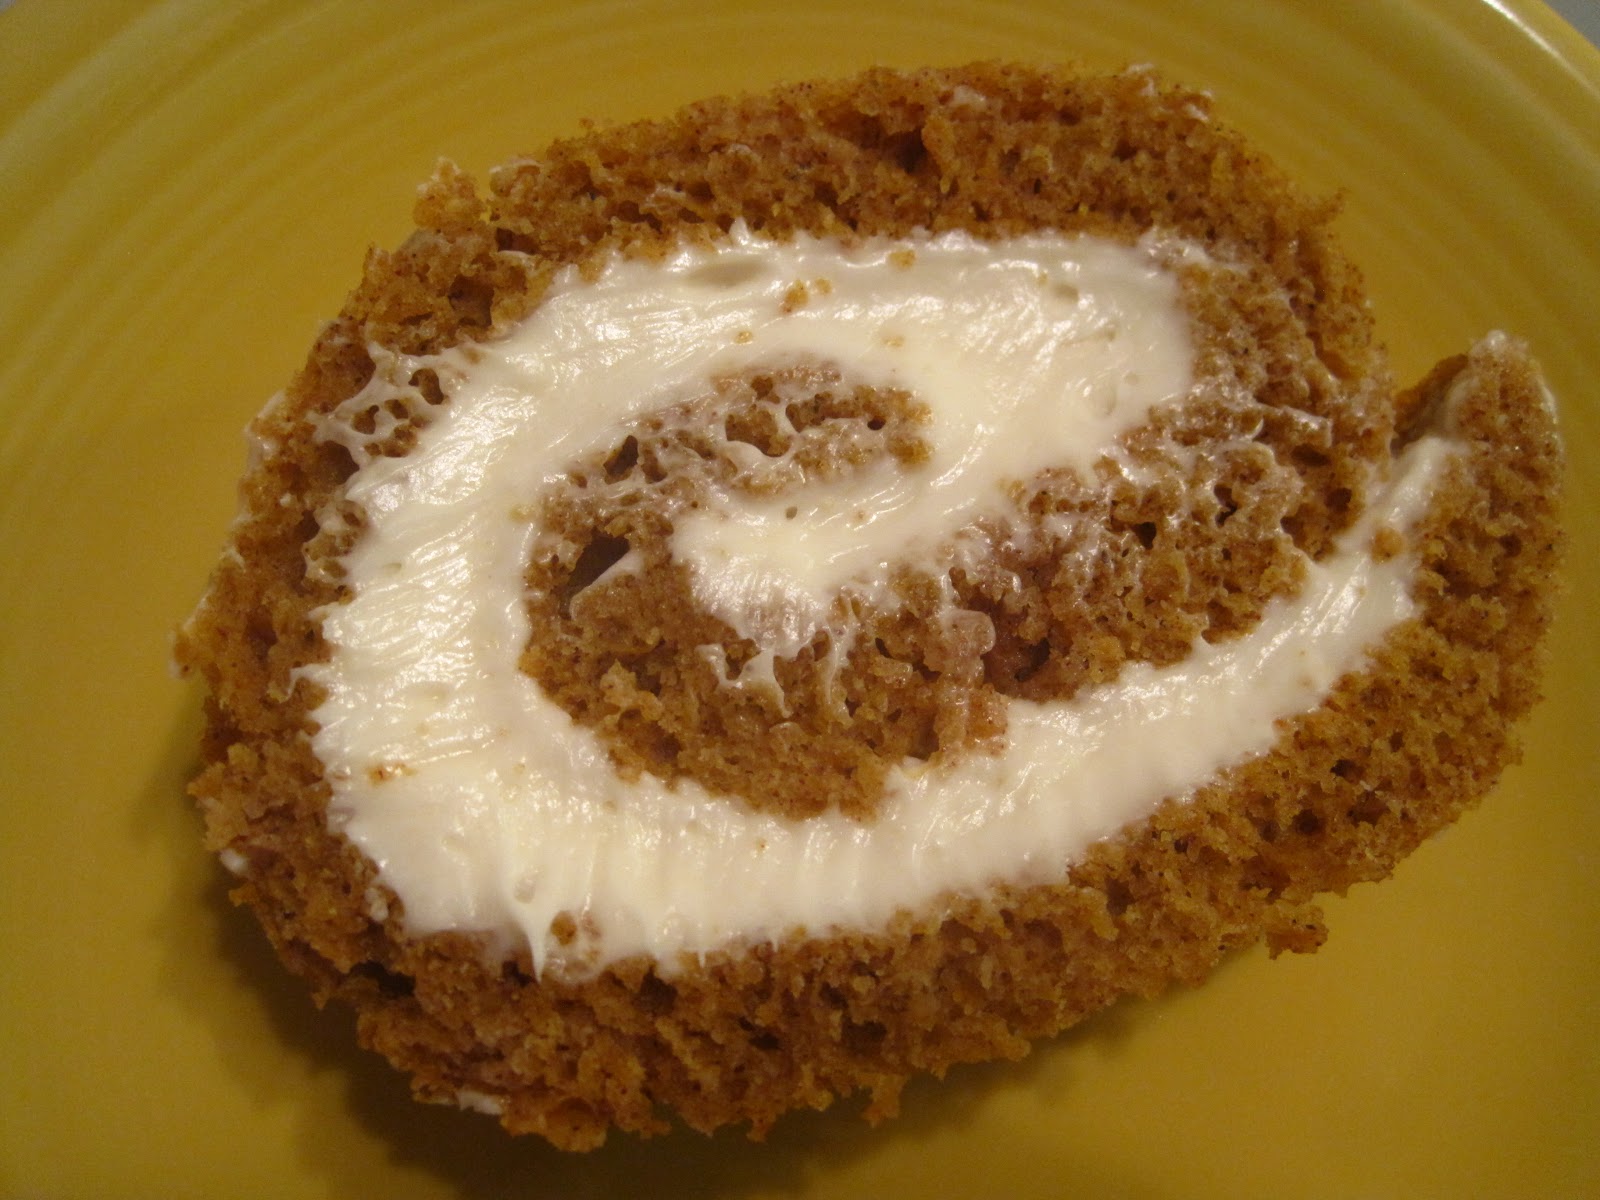
Pumpkin roll is a class autumn dessert. I first learned this recipe from some Amish folks I met in my travels, and I will now pass it on to you dear traveler of the internets. Just promise me that every fall you will share this delicacy with friends and family.

Serves: 8

Ingredients:
Roll
  • 1 C pumpkin puree
  • 3 eggs, beaten at high speed (5 minutes)
  • 1 C sugar
  • 0.75 C flour
  • 1 tsp baking powder
  • 2 tsp cinnamon
  • 1 tsp nutmeg
  • 0.5 tsp ginger
  • 0.5 tsp salt
Filling
  • 1 C confectioner's sugar
  • 0.25 C butter
  • 8 oz. cream cheese (softened)
  • 1 tsp vanilla extract
Equipment:
  • Large bowl
  • 2 Medium bowls
  • Hand mixer/stand mixer
  • Jellyroll pan
  • Wax paper
  • Clean towel 
  • Oven

Procedure:
  • Preheat oven to 375ºF
  • Beat eggs at high speed for 5 minutes
  • Add pumpkin and sugar to beaten eggs
  • Sift and mix dry ingredients (see Figure 1.)
  • Add dry ingredients gradually to pumpkin mix
  • Pour into a wax paper lined jellyroll pan
  • Bake until golden brown (approximately 15 minutes) (see Figure 2.)
  • Place on a damp clean towel sprinkled with confectioner's sugar and roll up (see Figure 3.)
  • Cool for one hour (see Figure 4.)
  • Make filling by beating together the filling ingredients (see Figure 5.)
  • Unroll, add filling, re-roll (see Figure 6.)
  • Enjoy (see Figure 7)

Figure 1. The dry ingredients

Figure 2.a Golden brown achieved
Figure 2.b Golden brown

Figure 3. Place on a damp clean towel sprinkled with confectioner's sugar 

Figure 4. Cool for one hour

Figure 5. Make filling while the roll cools

Figure 6. Add frosting and re-roll


Figure 7. Enjoy

Saturday, January 27, 2018

Mojito Infusion Recipe


Mojito Infusion Recipe

I have been toying with creating various teas and infusions (also known as herbal tea, it is "tea" made without any part of the tea plant). In this case, it was opportunity, not necessity, which drove innovation. I like growing my own herbs, and mint is one of my favorites. Click here for my mint infusion recipe. I wanted to try another variation using mint; I also found myself with access to a large amount of limes (don't let the above photo fool you, this is a lime that I just zested. I grew up with a Bearss sweet lime tree, which produces yellow limes, in my parents' backyard. Teachers at school never believed me when I said that limes were yellow.

The combination of mint and lime made me think of mojitos. I can't say from experience what a mojito tastes like, but it should be mint, lime, and rum.

Recipe, trial 1:
  • 1/2 teaspoon fresh lime zest
  • 1/2 teaspoon dried mint leaves
  • Steep in a 2 cup tea pot for five minutes
  • Add sugar to taste
Observations:

The infusion was good, but a little weak. Variables to explore in future trials: increasing to 1 teaspoon lime zest and mint leaves, dried lime zest instead of fresh.

This was just the first step, and with a bunch of dried mint leaves and frig drawer full of limes, I will be experimenting with recipes and ratios.


Monday, April 3, 2017

Homemade Sugar Cubes


There is something fun about sugar in cube/lump/morsel form. They also provide a convenient unit for sweetening tea and other drinks. But commercial sugar cubes are  expensive. This drove me to plumb the depths of the internets (a quick google search) to find an alchemic method of conjuring sugar cubes at home.

The incantation recipe which looked most promising came from Marcia Simmons at this food blog (to be clear, I have no affiliation with this blogger or blog, but I like to cite my sources).

Ingredients:
  1. 1/4 C granulated sugar
  2. 1/2 tsp water
Proceedure:
  • Mix 1/2 teaspoon water into 1/4 cup sugar (should be a moist dough, see figure 1)
  • Press into shape using hands or molds (see figures 2-5)
  • Allow to dry overnight (8ish hours)
I made several batches of the above ingredient ration (probably about 1.5 cups sugar). I tried four different ways of shaping my trial 1 sugar cubes:
  1. half teaspoon (figure 2)
  2. hand (figure 3)
  3. filling a loaf pan and then dividing into cubes (figure 4)
  4. ice cube tray (figure 5)
Figure 1.

Figure 2.
 Figure 3.
 Figure 4.
 Figure 5. I don't own any normal ice cube trays, so I used my Titanic and iceberg tray


Results and Observations:
Results


The sugar cubes shaped with the half teaspoon and by hand hardened perfectly. I am very excited to achieve such success. 

The sugar cubes in the loaf pan also hardened, but a few crumbled during extraction. Sadly, the sugar cube Titanic and iceberg crumbled completely. This is thought to result from the mold slowing the rate the sugar cubes dry. Further testing with longer drying times is needed to sink a sugar Titanic into my cuppa.

Monday, December 12, 2016

Homemade Christmas Tea


Introduction:

Now that we are living in California again, there is no Christmas market for us to visit this Advent season. One of our favorite things at the Grenoble Christmas market was the thé du Noël (Christmas tea). The absence of Christmas tea has driven me to scour the internet for recipes. Most American "traditional" recipes included "orange drink mix" as the base ingredient. That is not traditional or acceptable. The recipe I settled on comes from a French blogger (post here). I have translated her recipe to the best of my ability, and have modified it only by the omission of cloves which I do not prefer.

Ingredients:


  • 100 grams black tea (unflavored)
  • 1 orange
  • 1 lemon
  • 1 tsp vanilla powder (not liquid extract)
  • 1 tsp ground cinnamon
  • 1/2 tsp ground cardamom


Procedure:


  1. Preheat oven to 210 deg F
  2. Wash, dry, and peel orange and lemon into long strips using a potato peeler (be sure to only get the zest and none of the white, which is very bitter)
  3. Cut peel into small even squares
  4. Place peel evenly on a parchment lined baking sheet
  5. Bake peel for 1 hour
  6. Mix dry ingredients together and add dried peel once baked.
  7. Boil water and steep like normal black tea (1 tsp tea/cup, steep 5 mins)
  8. Store in a metal tin for longevity
  9. Enjoy!

Results and Observations:

C'était bon ! (It was delicious!). The tea turned out very well. This tea can be enjoyed as is without further modification.

However, what fun would this be without a little experimentation? The citrus flavors were not very pronounced, so I think I will try increasing that. The vanilla was also not very strong (but a critical background flavor?), so I may try omitting it in the future (also, vanilla powder is somewhat pricey)

Thursday, September 1, 2016

Cold Brew Coffee Trial 1.

Introduction:
Everyone loves coffee and one of the current coffee trends is "cold brew". This cool manifestation of coffee requires little equipment or technique to create. With a little experimentation, I hope perfect the recipe and procedure.


Ingredients and Materials:

1 cup whole coffee beans
4.5 cups of filtered water (eliminates tapwater taste variables)
Coffee grinder
Brewing vessel
Airtight storage vessel 

Procedure:

  • Course grind coffee beans (should appear courser than sand)
  • Add grounds and filtered water to brewing vessel (see figure 1.)
  • Store brewing vessel at room temperature for more than 12 hours but less than 15 hours (variable for future experimentation)
  • Pour cold brew from brewing vessel through a fine sieve into the airtight storage vessel (see figure 2.1 and 2.2)
  • Seal cold brew in airtight storage vessel (see figure 3) and store until drinking (store in the refrigerator for increased temperature reduction)
  • Drink and enjoy (I am enjoying my first glass of cold brew as I write this post)

Results and Observations:
The coffee has strong flavor (stronger than hot brewed coffee which has been forgotten and allowed to cool down) and lacks some of the acidic taste. These findings are consistent with reports about cold brew. Further testing is needed/desired


Figure 1.


Figure 2.1
Figure 2.2
Figure 3

Thursday, March 17, 2016

Chocolate chip cookies cooked on a waffle iron: baking fail

Chocolate Chip Waffle Cookies

The idea seemed simple enough: use a waffle iron to make waffle cookies and then drizzle chocolate on top. We decided to try this experiment. My standard chocolate chip recipe was used with the exception of the chocolate chips which were to be melted and drizzled on after.

We set the waffle iron on the lowest setting to begin (and intended to adjust higher if needed during subsequent trials)

Trial 1 Results: Catastrophic Failure

Further trials were suspended as a result of trial 1's disaster

Speculations of what led to the accident:
  • Waffle iron was not greased before adding dough
  • Dough may need to be thicker (higher flour content?) for desired results
  • Human error
Thankfully the remainder of the dough was quickly converted into normal chocolate chip cookies and enjoyed

Thursday, December 10, 2015

Candy Cane Chocolate Chip Cookies: baking fail

Candy Cane Chocolate Chip Cookies

The idea seemed simple enough: add crushed candy cane to chocolate chip cookie dough. For this experiment, I used my standard chocolate chip cookie recipe.

I had high hopes for this batch (see fig 1.) of hybrid candy cane chocolate chip cookies. As you will see, the results differed from my expectations and proved my hypothesis, that adding crushed candy cane would create a simple Christmas variation of this classic cookie, very wrong. We have to be honest when our plans go awry.


Figure 1.

Results and Observations:

The candy cane bits melted during the baking process, leaving gaping holes in the cookies, and adhered to the cookie sheet which resulted in fractured cookies when attempting to move them to the cooling rack.

Thankfully the candy cane modification was only added to twelve cookies (see fig 2). The rest of the dough served as a control group and yielded wonderful and normal chocolate chip cookies.


Figure 2. The results of Trial 1 candy cane cookies


Figure 3.

Thursday, November 19, 2015

From fresh pumpkin to purée Trial 3: Baked again

Introduction: 
The return of Autumn signifies it is time to bake another pumpkin. Canned pumpkin purée is not sold in France, so I have to make my own. You can read here about trial 1 and trial 2. I have found that for my baking purposes baked pumpkin works best.


fig 1. The test subject
Procedure:
  • Cut pumpkin in half and scoop out guts. See fig 2. Save the seeds for roasting
  • Line a baking sheet with foil, place pumpkin halves cut-side down (see fig 3), and cover with foil. See fig 4.
  • Bake at 375oF (approx 190oC) for about 1.5 hours or until soft)
  • Allow to cool
  • Scoop out flesh and mash/blend until smooth
fig 2.
fig 3.
fig 4.
Results and Observations:
Pumpkin was successfully converted into purée. Lining the baking sheet with foil saved a lot on clean-up.

Saturday, October 31, 2015

Roasted Pumpkin seeds

Happy Halloween!

The next time you find yourself carving a pumpkin, make sure to save the seeds for roasting.

Simply throw the seeds on a baking sheet, sprinkle with olive oil, and dust with salt or other seasonings. Bake at 300ºF/150ºC for 30 to 45 minutes (until seeds are golden brown) and enjoy

Friday, October 2, 2015

Gluten Free (but with dairy) Scone Trial (3)

Introduction:
Continuing the gluten free scone trials (these scones were made with dairy at the request of my friend whose birthday we were celebrating)

Other than using the dairy products, the recipe and procedure are the same as trial 2. The scones of trial 2 were not very sweet and not very raspberry-y. For this trial the sugar was increased to 1/2 C and the frozen raspberries to 1 & 1/4 C.


(red ingredients were modified in this trial)
Ingredients:
2 C gluten-free flour
1/2 C wht sugar
1 & 1/4 tsp baking powder
1/4 tsp baking soda
1/4 tsp salt
1/2 C butter cubed (chilled)
1 & 1/4 C frozen raspberries (error on the side of too much)
1 tsp vanilla extract
2/3 C buttermilk

Results and Observations:

The scones of this trial had the desired sweetness and raspberry flavor. No glaze was needed.
Scone texture was good, and using gluten-free flour did not to affect this. The slight chewiness of the scones is consistent with previous fruit scone trials (regardless of the presence of gluten).

I would say we have a successful gluten-free scone recipe. Next goal will be to make it both gluten and dairy free.

Saturday, August 15, 2015

Gluten/Dairy Free Trial 2: Raspberry scones

Introduction:
Today I continued the experiment with gluten and dairy free baking. Three frieds who have a combination of gluten and dairy alleries are the inspiration for this experiment. The normal challenge when baking gluten-free is finding replacement for the gluten molecules, but this is not an issue given the characteristic texture of scones. One of the purposes for adding buttermilk (non-dairy in this case) is to breakdown some of the gluten strands which form in the dough. The difficulty with this recipe is finding adequate replacement for the buttermilk and its role as a chemical leavening (the adic in the buttermilk reacts with the baking soda to form gas bubbles within the dough). For these scones I adapted my chocolate chip scone recipe

Procedure:

(red ingredients need modifying, see Results and Observations)
Ingredients:
2 C gluten-free flour
1/4 C wht sugar
1 & 1/4 tsp baking powder
1/4 tsp baking soda
1/4 tsp salt
1/2 C margarine cubed (chilled)
3/4 C frozen raspberries
1 tsp vanilla extract
2/3 C non-dairy buttermilk

Glaze:
approx 1/4 C frozen raspberries
1/2 to 1 C powdered sugar, enough to form a thin paste when mixed with the raspberries

Directions:
  • Preheat oven to 400oF (200oC), set oven rack to middle, line baking sheet with parchment paper
  • Mix flour, sugar, baking powder, baking soda, and salt (see fig 1.)
  • Set raspberries in a bowl to defrost (fig 2.)
  • Cut in margarine(using pastry knife)
  • Mix 2 tablespoons lemon juice with enough coconut milk to create 2/3 C non-dairy buttermilk. Allow to sit at least 5 minutes (see fig 3.)
  • Drain excess liquid from raspberries and stir in
  • In separate bowl whisk buttermilk and vanilla, add to dry ingredients
  • Stir just until dough comes together (don't overmix)
  • On floured surface knead dough 4-5x
  • Pat dough 1.5" thick and cut into 8 wedges.  Place on baking sheet (see fig 4.)
  • Brush tops with coconut milk
  • Bake 15-20 mins (until golden brown)
  • Cool and enjoy!
  • For glaze, allow scones to cool and then pipe glaze onto scones (see fig 5.)


Figure 1. Dry ingredients. Note the unique texture because of gluten-free flour


Figure 2. Allow frozen raspberries to defrost to remove excess liquid

Figure 3. Non-dairy buttermilk sitting for five minutes

Figure 4. Scones ready to bake

Results and Observations:

The scones were not bad, but not perfected. The texture was chewy, and perhaps this is from the use of margarine or a lack of adequate leavening. The non-dairy buttermilk may not have been strong enough to react properly or the bubbles may have been lost due to overmixing (human error).

The scones also lacked sufficent sweetness and raspberry flavor. Looking back on my notes from previous fruit scone trials I see a lack of sweetness has been a problem before. The 1/4 C sugar works in tandem with the sweetness of the chocolate chips in the original recipe, but needs supplementing for fruit scones. Also, the quantity of fruit used was too little. 3/4 C chocolate chips may suffice, but I should have increased the amount of raspberries to at least 1 cup.

I employed the raspberry glaze to make up for the lack of sweetness and raspberry flavor. The good news is my friends were more pleased with the results than I.

Changes to try next time:
use 1/2 C sugar
use 1+ C fruit (still allow to defrost and drain)


Figure 5. Glazed scones

Monday, February 23, 2015

Baked Camembert Trial 1.

Baked Camembert Trial 1.
Today's experiment was inspired by the availability of excellent French cheeses and the concept of baked brie. My french friends may shake their heads at the idea of baked camembert; it is hard to know what is considered acceptable creativity and what is food blasphemy.

Ingredients:

  • 1 camembert round
  • Pre-made puff pastry dough (attempting to make my own puff pastry dough is too advanced/labor intensive for me. Bakers in France begin studying and apprenticing to learn to make delicacies likes croissants and pain au chocolat (chocolate croissants) in high school. I leave such baking artistry to the professionals.
  • 1/4 to 1/3 cup jam

Procedure: 

  1. Preheat oven to 425 deg F or 220 deg C
  2. Unroll pastry dough and place camembert in the middle.
  3. Place jam on top of the camembert
  4. Fold dough over the camembert. (see Figure 1.)
  5. Bake in oven for approximately 15 minutes or until pastry is golden brown (see Figure 2.)
  6. Cool and enjoy

Figure 1.

Figure 2. Glory
Observations:

I allowed the camembert to age a bit too long in the refrigerator so the taste was more pungent than a younger camembert would be. Brie is mostly sold in wedges instead of small rounds like camembert, which is why I chose to begin with camembert, but I think my next trial will be with a fresh wedge of brie.

Tuesday, December 9, 2014

Gluten/Dairy free baking. Trial 1

Introduction:
Today begins another series of baking experiments: Gluten free baking

Three of my coworkers have gluten allergies and have sparked this new endeavor. The challenge with baking gluten-free is finding other methods to replace the elastic nature and texture which gluten brings to a recipe.

For my first recipe to explore this gluten-free variable I chose a quick and easy bread sticks recipe (because who doesn't love bread sticks?) Trial 1. was the control group: gluten-free flour, but no additional attempts to supplement the missing gluten molecules.


Proceedure:

Ingredients:
1.25 cups gluten-free flour
2 teaspoons sugar
1.5 teaspoons baking powder
0.5 teaspoon salt
1/3 cup margarine (softened)
1/3 cup water
3 tablespoons margarine, melted


Directions:
  • In a small bowl, combine flour, sugar, baking powder and salt. 
  • Add softened margarine and water and stir to form a soft dough
  • Roll out until approximately 0.5 inch thick see Fig 1.
  • Cut into breadsticks. 
  • Add melted margarine to 9" x 13" pan. Place breadsticks in the margarine. see Fig 2.
  • Bake at 450 degrees F for 14-18 minutes or until golden brown. Serve warm. see Fig 3.

Figure 1. rolling out glutenless dough

Figure 2. bread sticks ready for baking

Figure 3. Finished product
Results and Observations:

The dough was very stiff, brittle, and crumbly like shortbread, but otherwise was buttery and delicious as normal. My three non-gluten coworkers enjoyed the bread sticks, so the end product was a success and trial 1 should serve well as a control group for future trials. I will keep you posted on my progress.